Update Settings
You can use the wiki settings to manage automated project updates, configure branch enablement and delete your projects.
You can only modify the settings for projects that you have admin role permissions on. Wikis that you don’t have permissions to modify settings for will not show the settings icon.
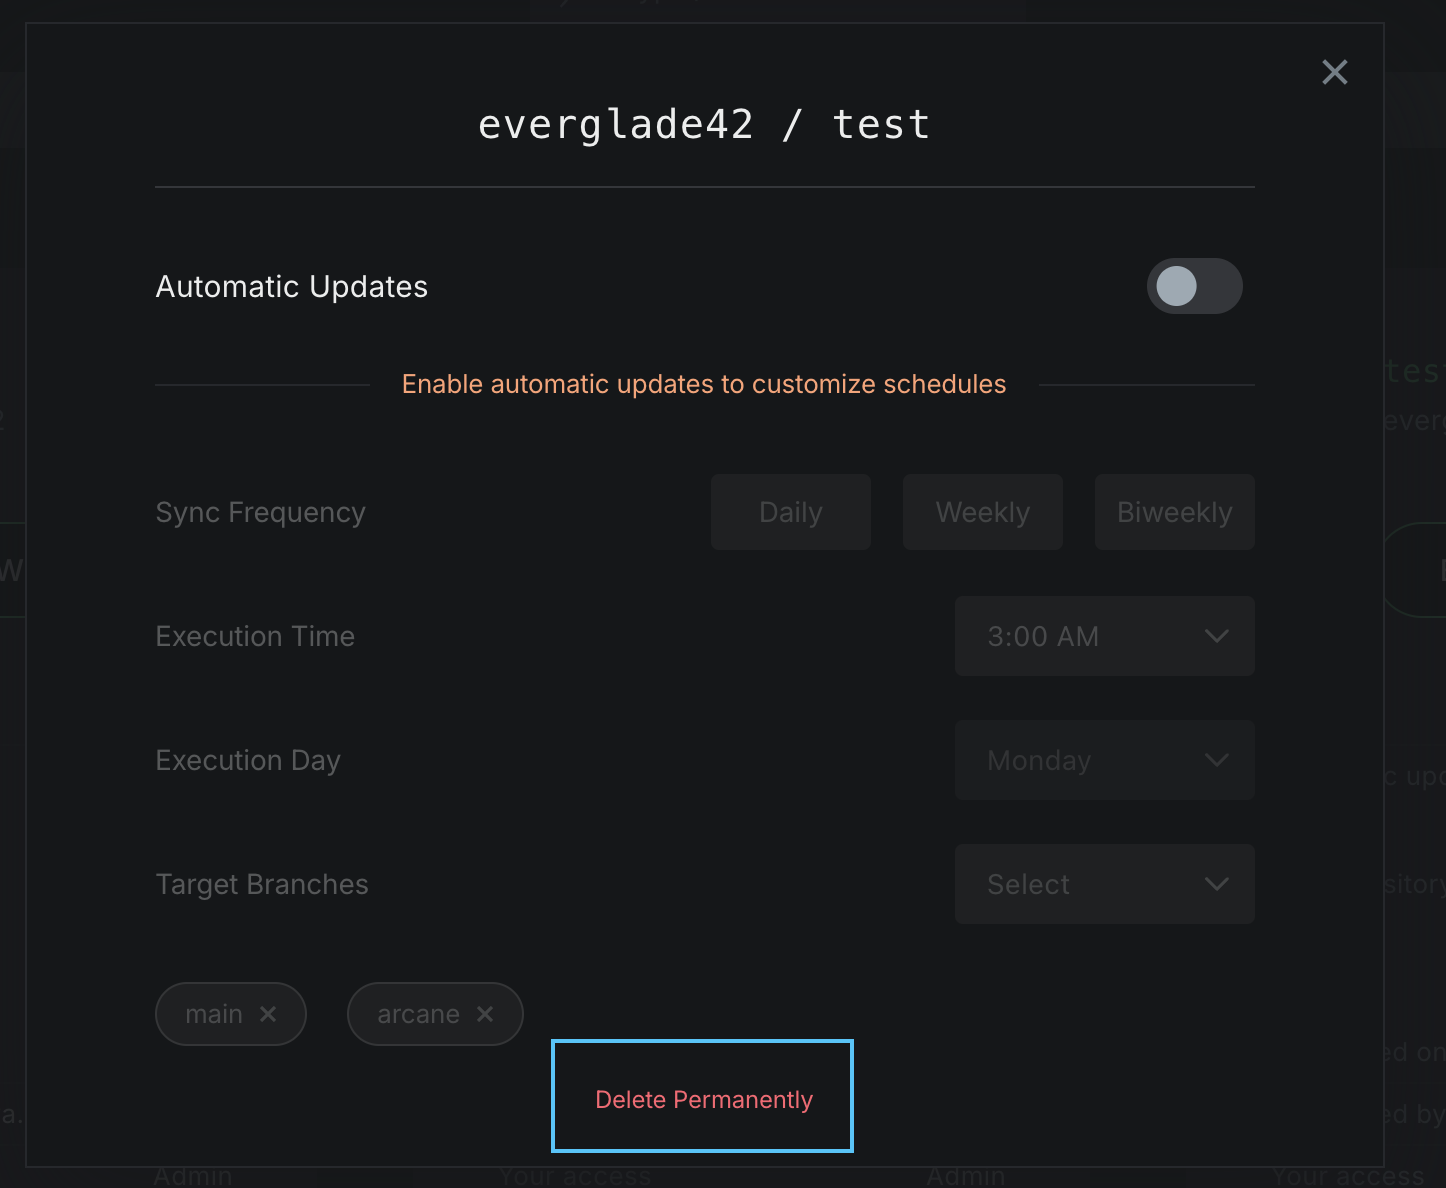
Manage Automatic Updates
Automatic updates will trigger pipelines at your preferred time and frequency, ensuring your wiki always stays updated.
- First, find the wiki you want to change the update settings for in the Library. Click on the settings menu button in the top right hand corner of the wiki card.
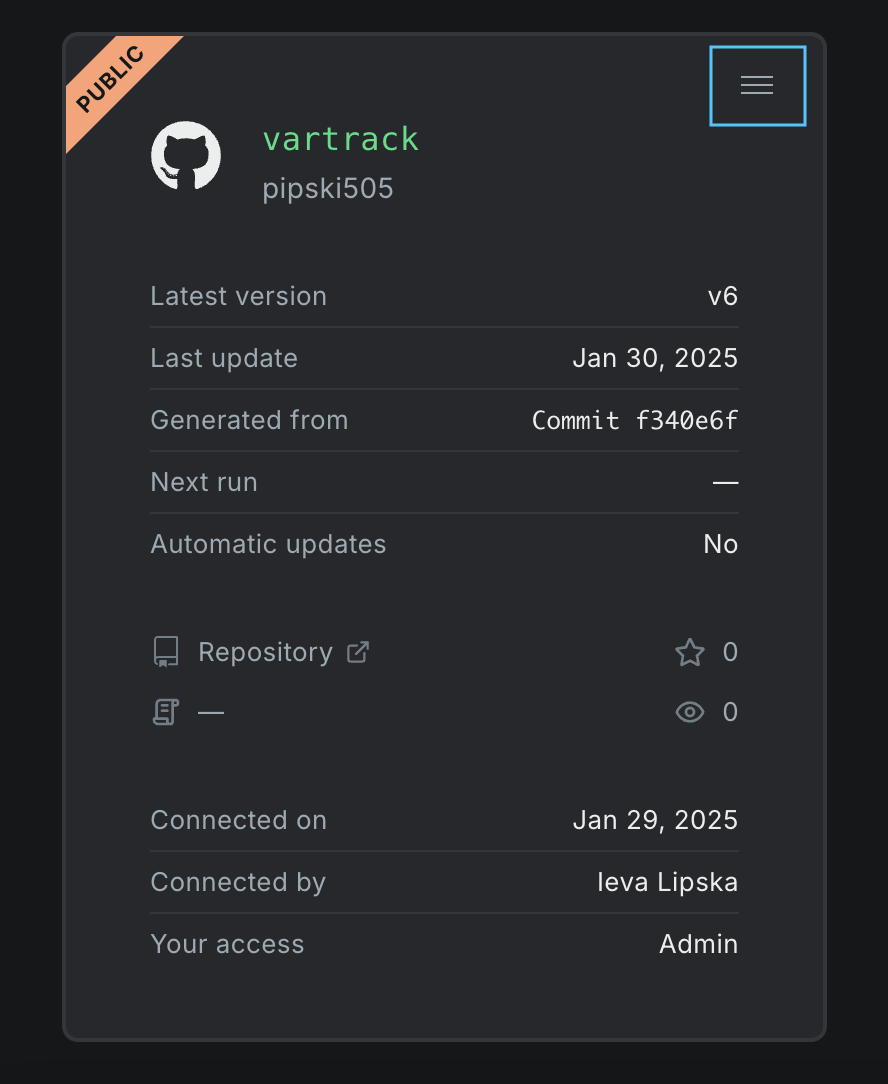
If your wiki card's setting button is greyed out, you do not have the correct access permissions to modify the settings.
- Click on the Schedule button.
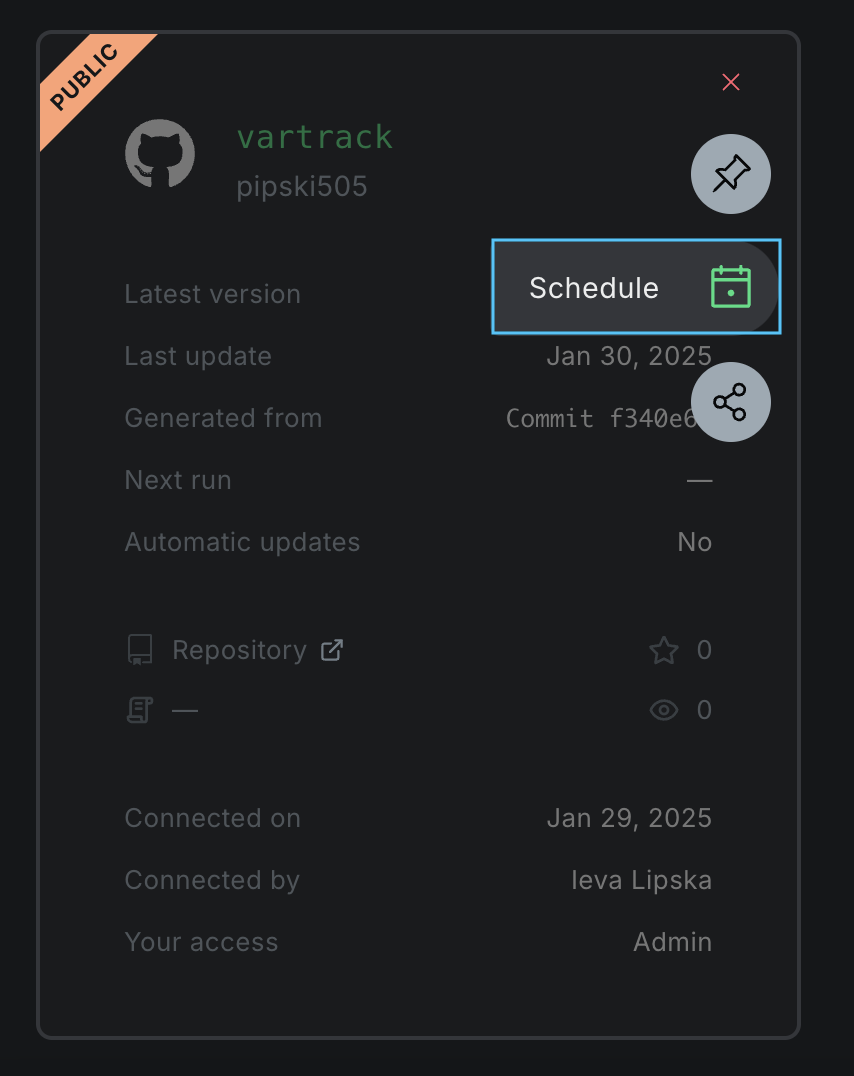
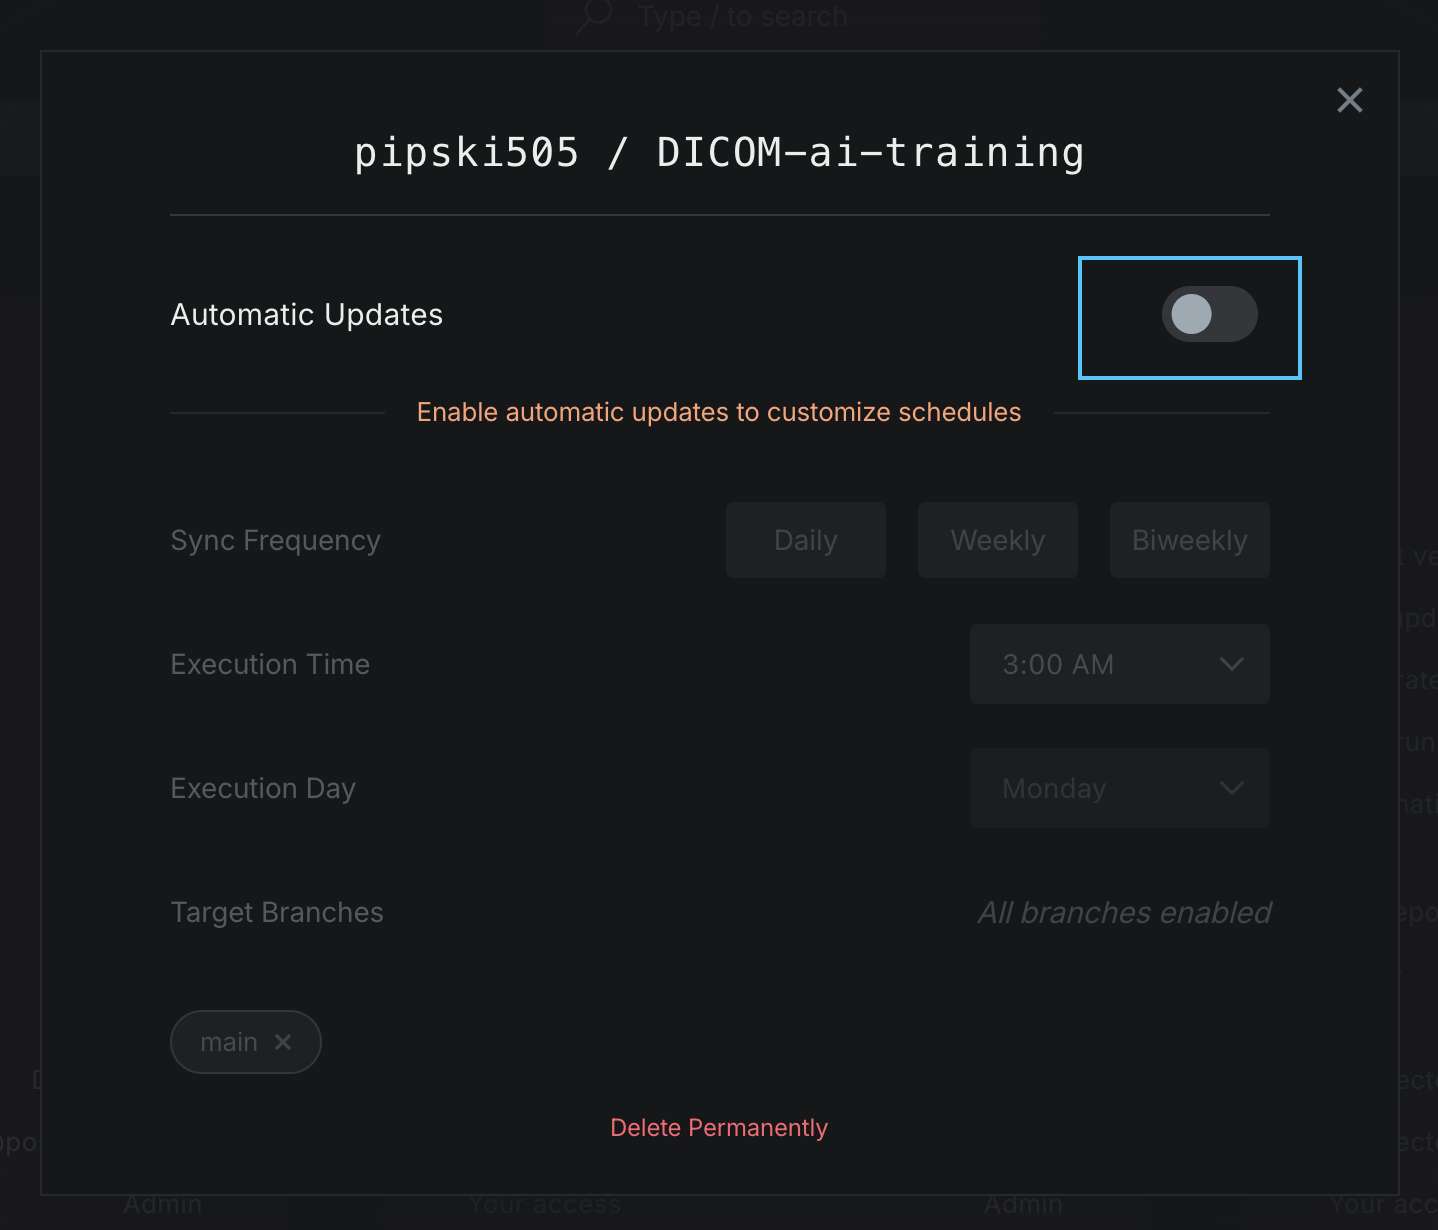
- This will open the update settings modal.
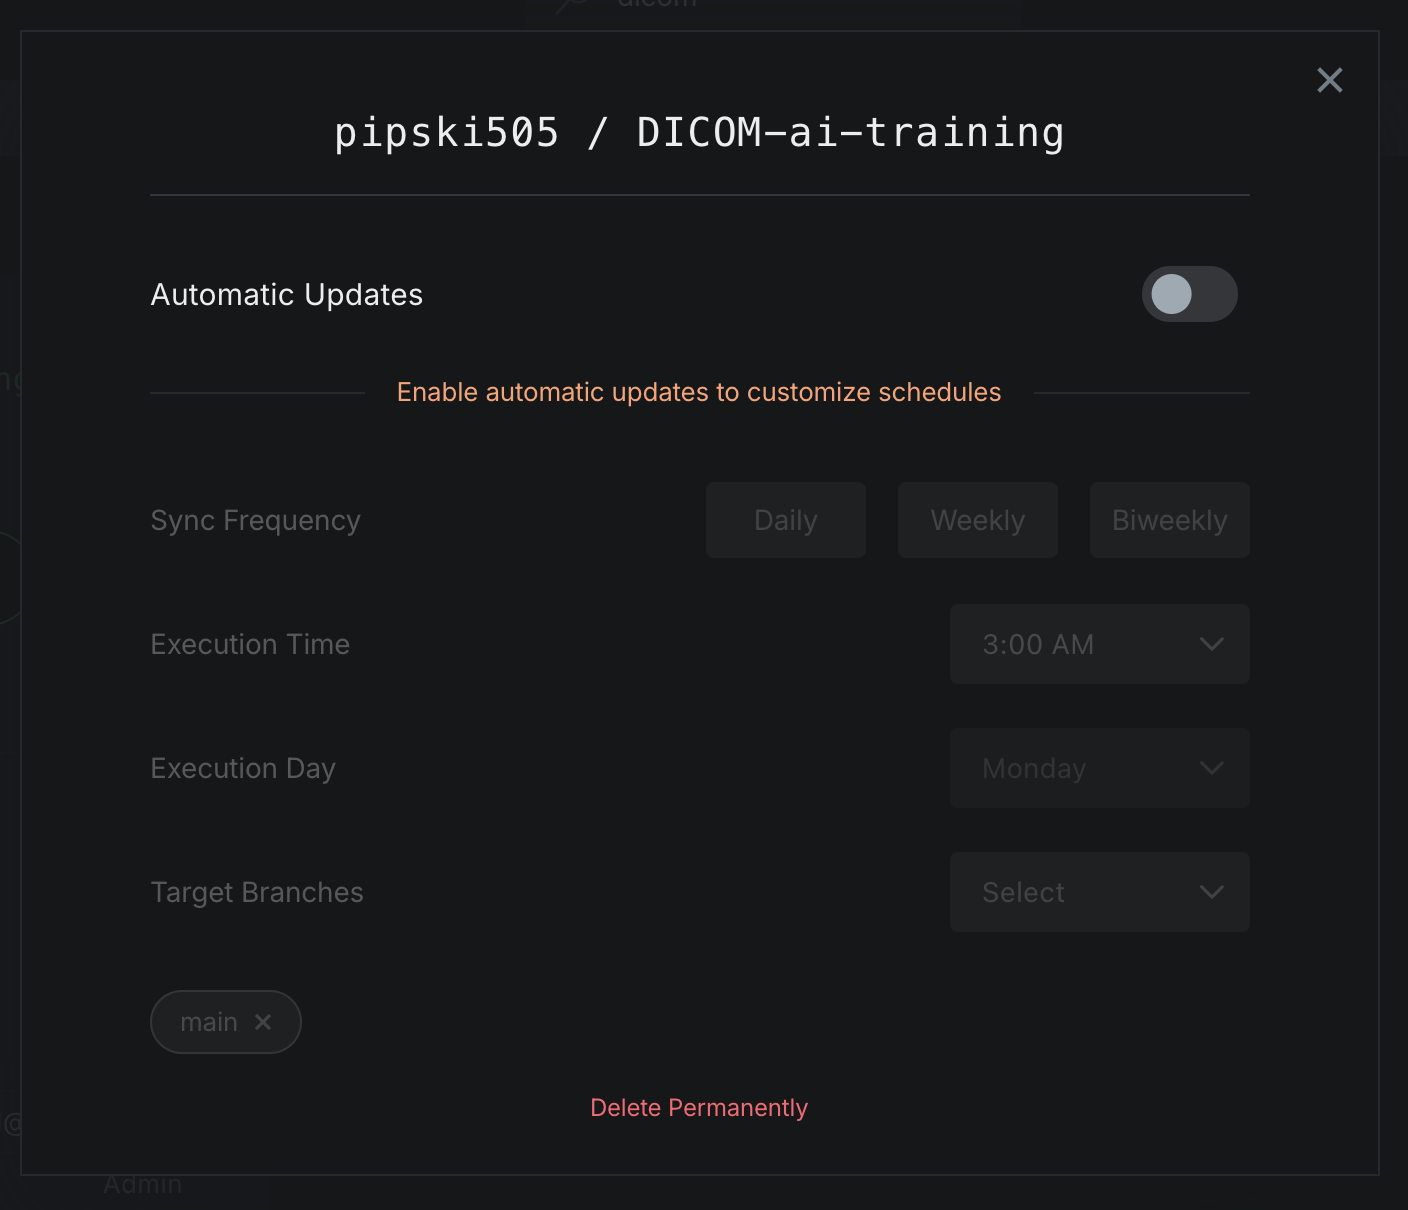
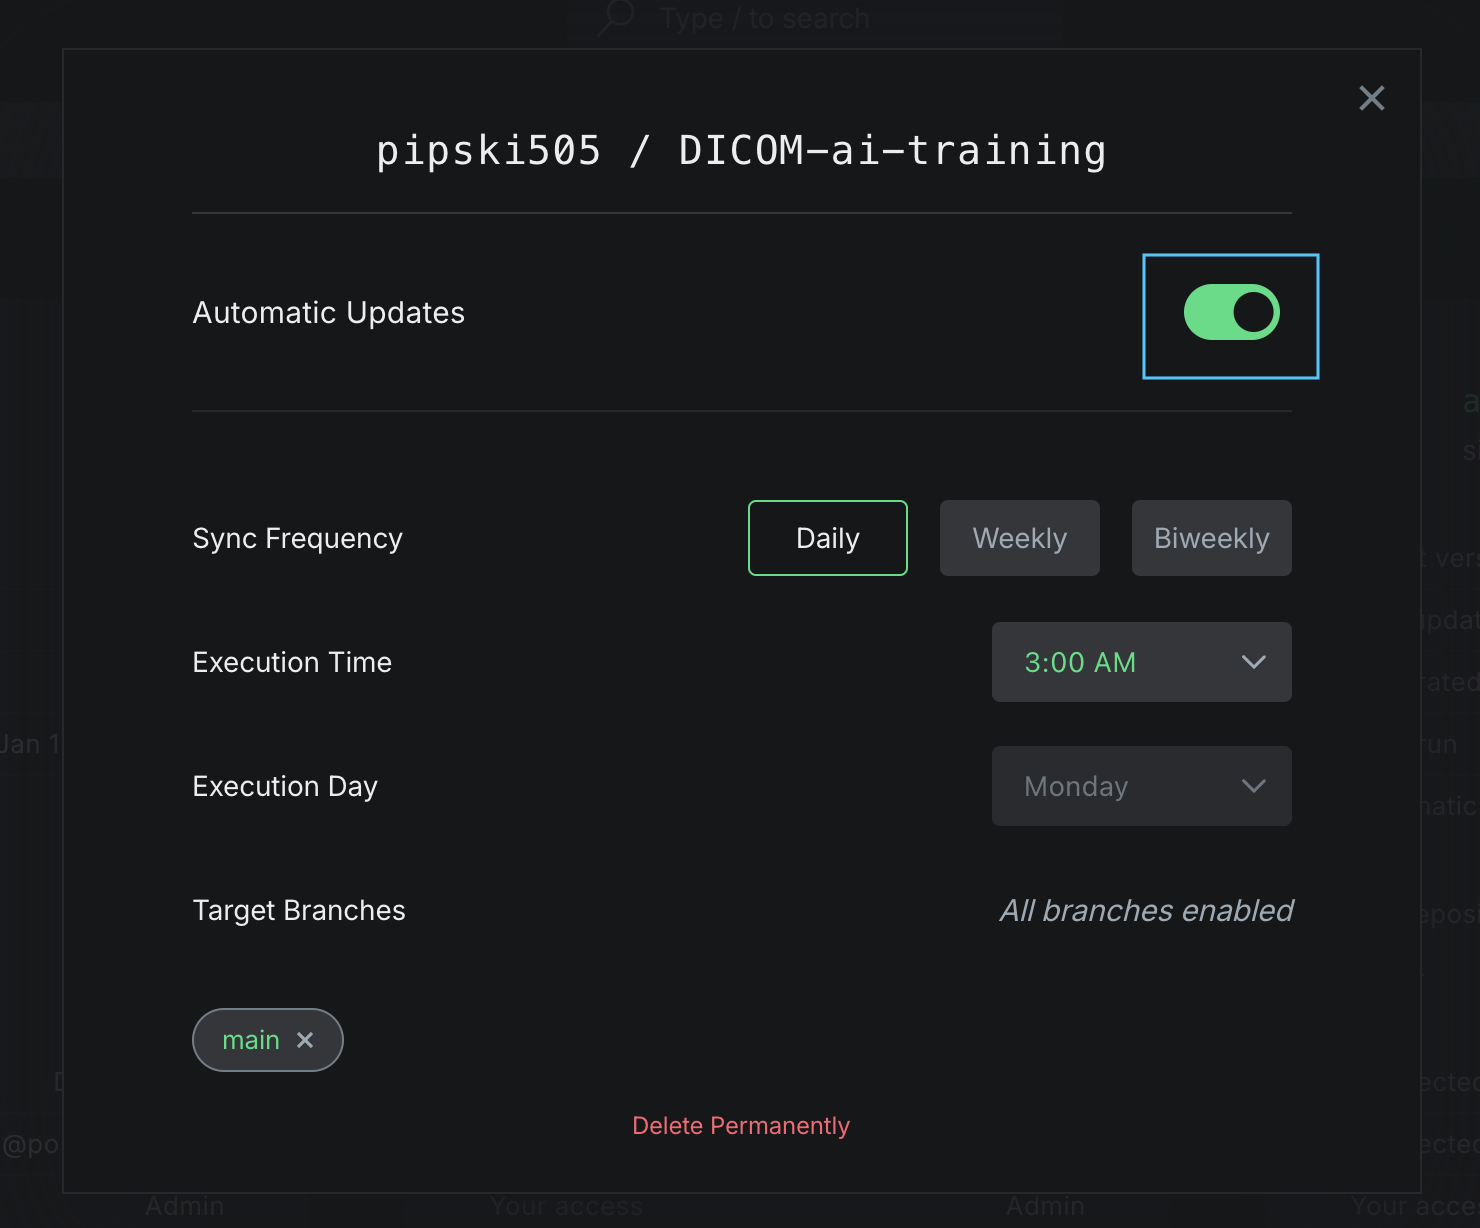
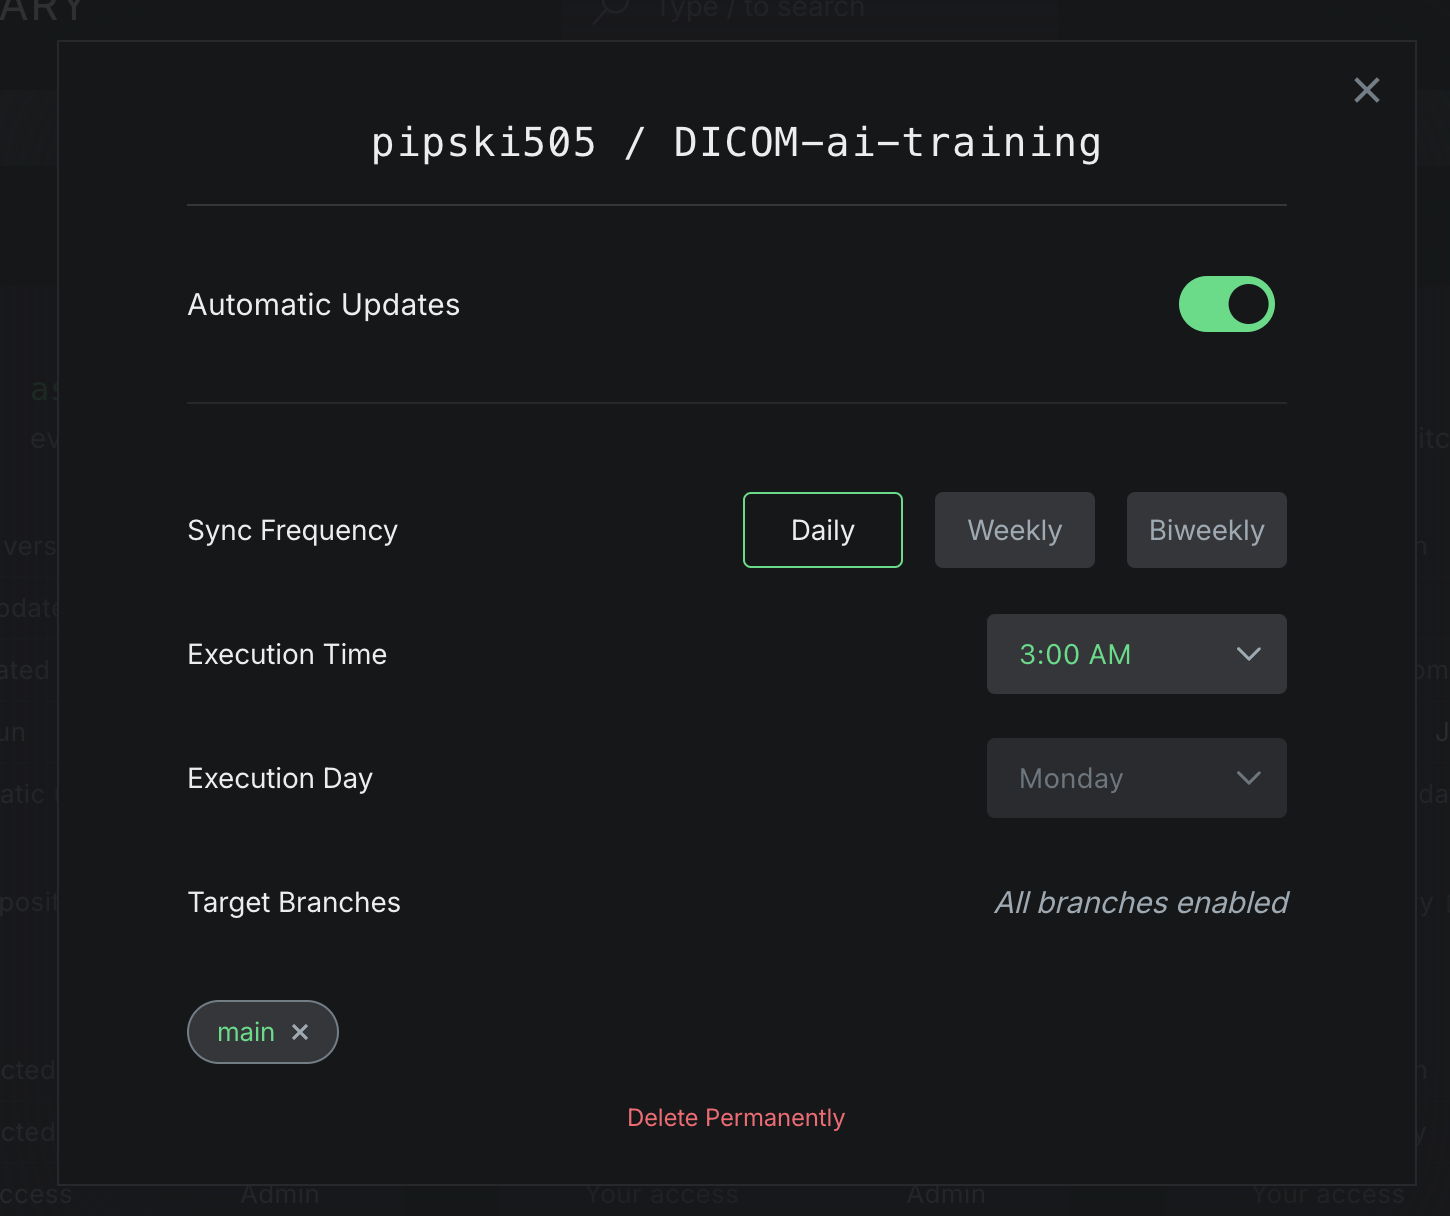
- Toggle on Automatic Updates for continuous wiki updates. You will see a toast confirmation confirming the change in settings and a helpful alert when the next wiki will be built.
When first enabling automatic updates, a default daily update setting at 3AM will be applied. You can change the default update settings for each project as required.
- To disable automatic updates, simply toggle off Automatic Updates. You will see a toast notification confirming the settings change.
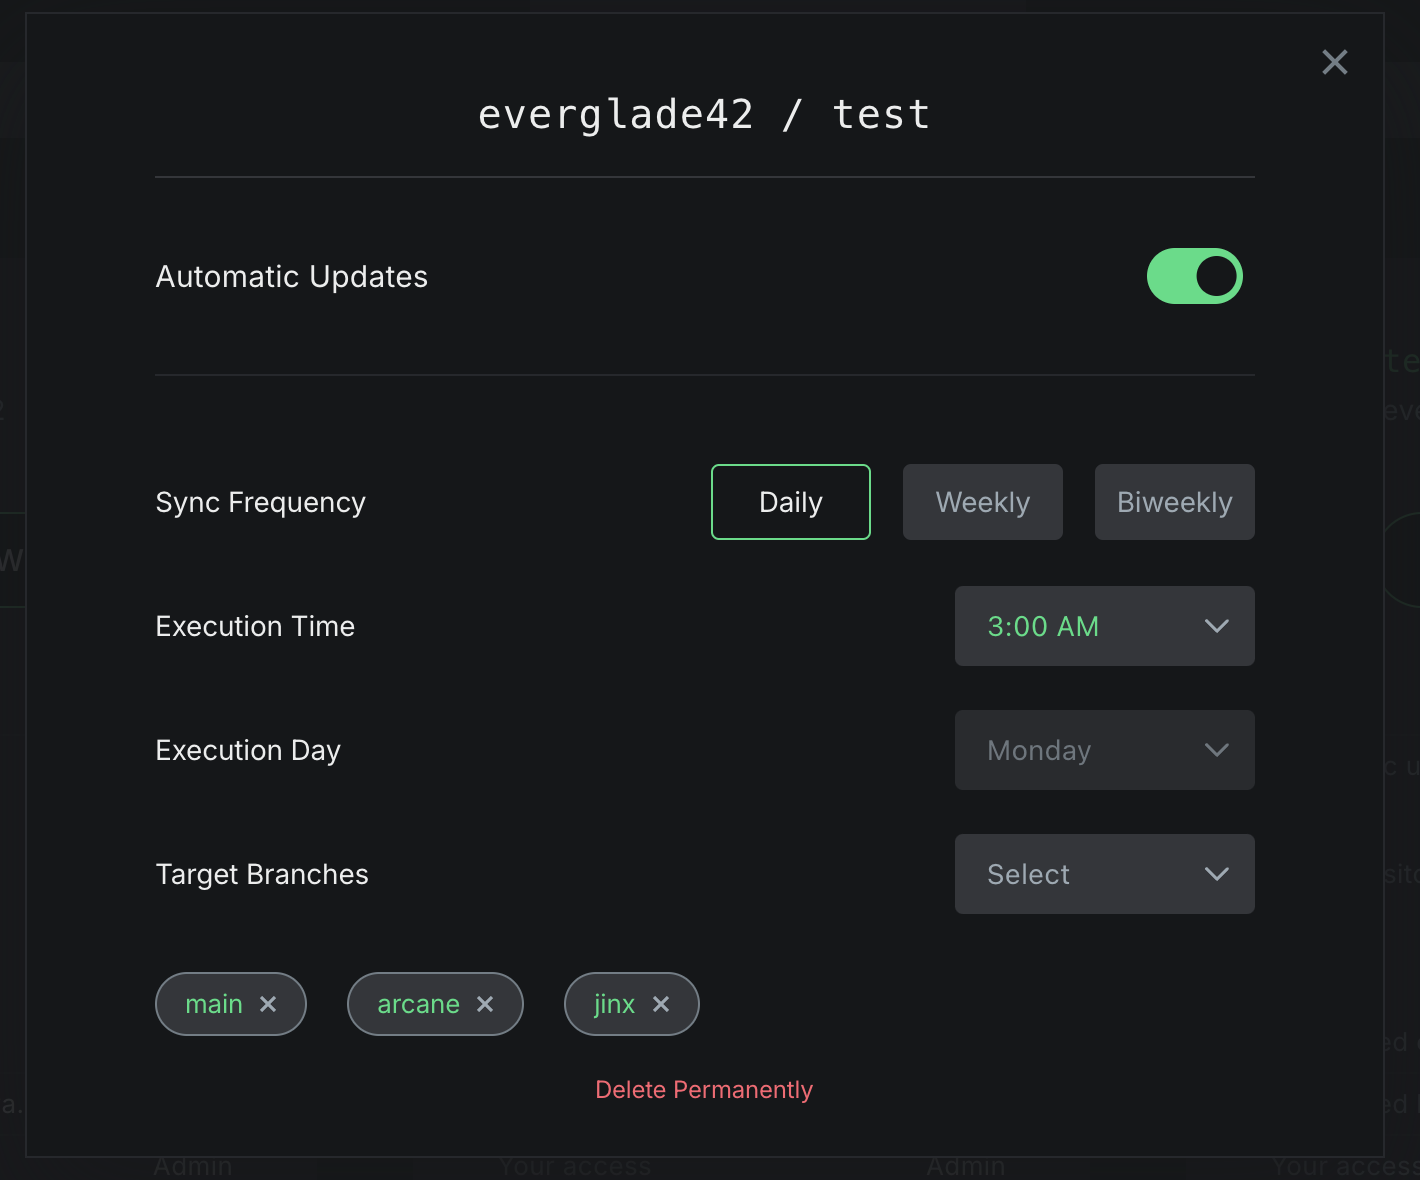
Manage Update Schedule
To manage the update frequency settings, a project must first have automatic updates enabled.
- Settings are initially configured to the default frequency of daily updates at 3AM.
- You can decrease the frequency of updates by selecting the Weekly or Biweekly options in Sync Frequency.
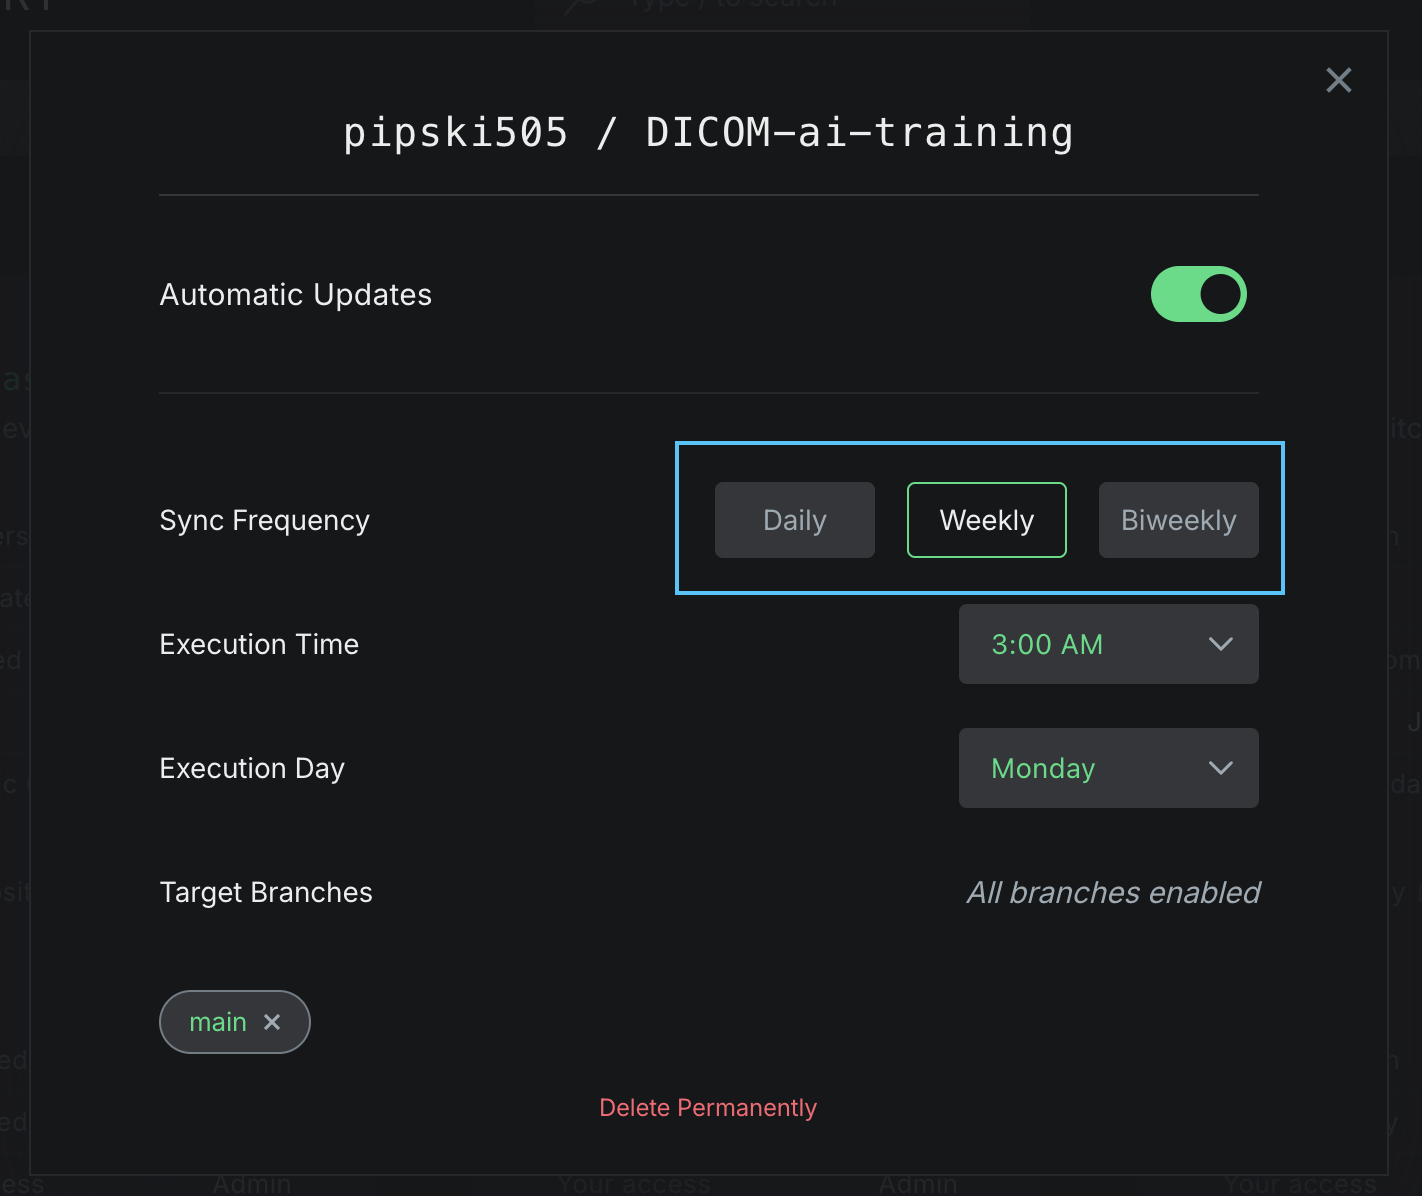
- To configure the time at which updates happen, select an hourly interval in Execution Time from the dropdown menu.

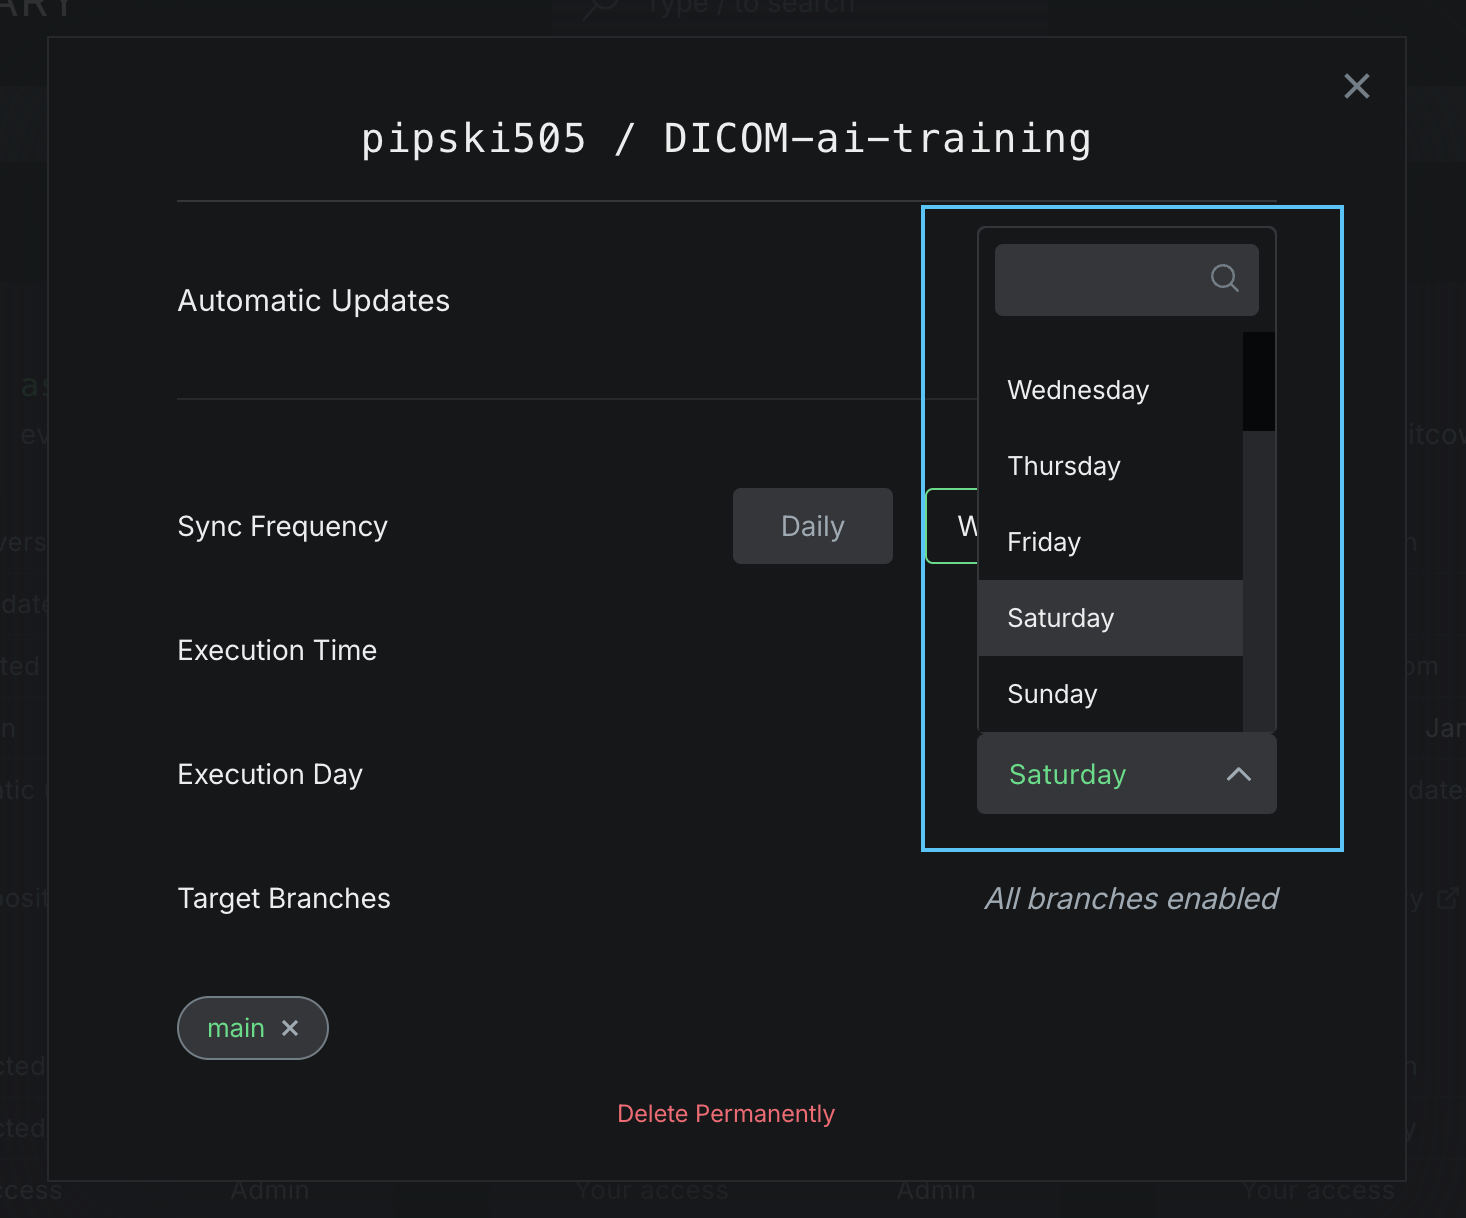
- For Weekly and Biweekly updates, you can also select the day on which updates will happen. Simply select an appropriate day from the Execution Day dropdown.
- Once you have configured the update settings as required, you can close the settings modal. Settings are saved automatically and confirmed through successful toast notifications as you edit the settings.
Manage Target Branches
By default, only the main branch of a project is enabled for documentation.
- To add a branch for documentation, select the desired branch from the dropdown menu of Target Branches.
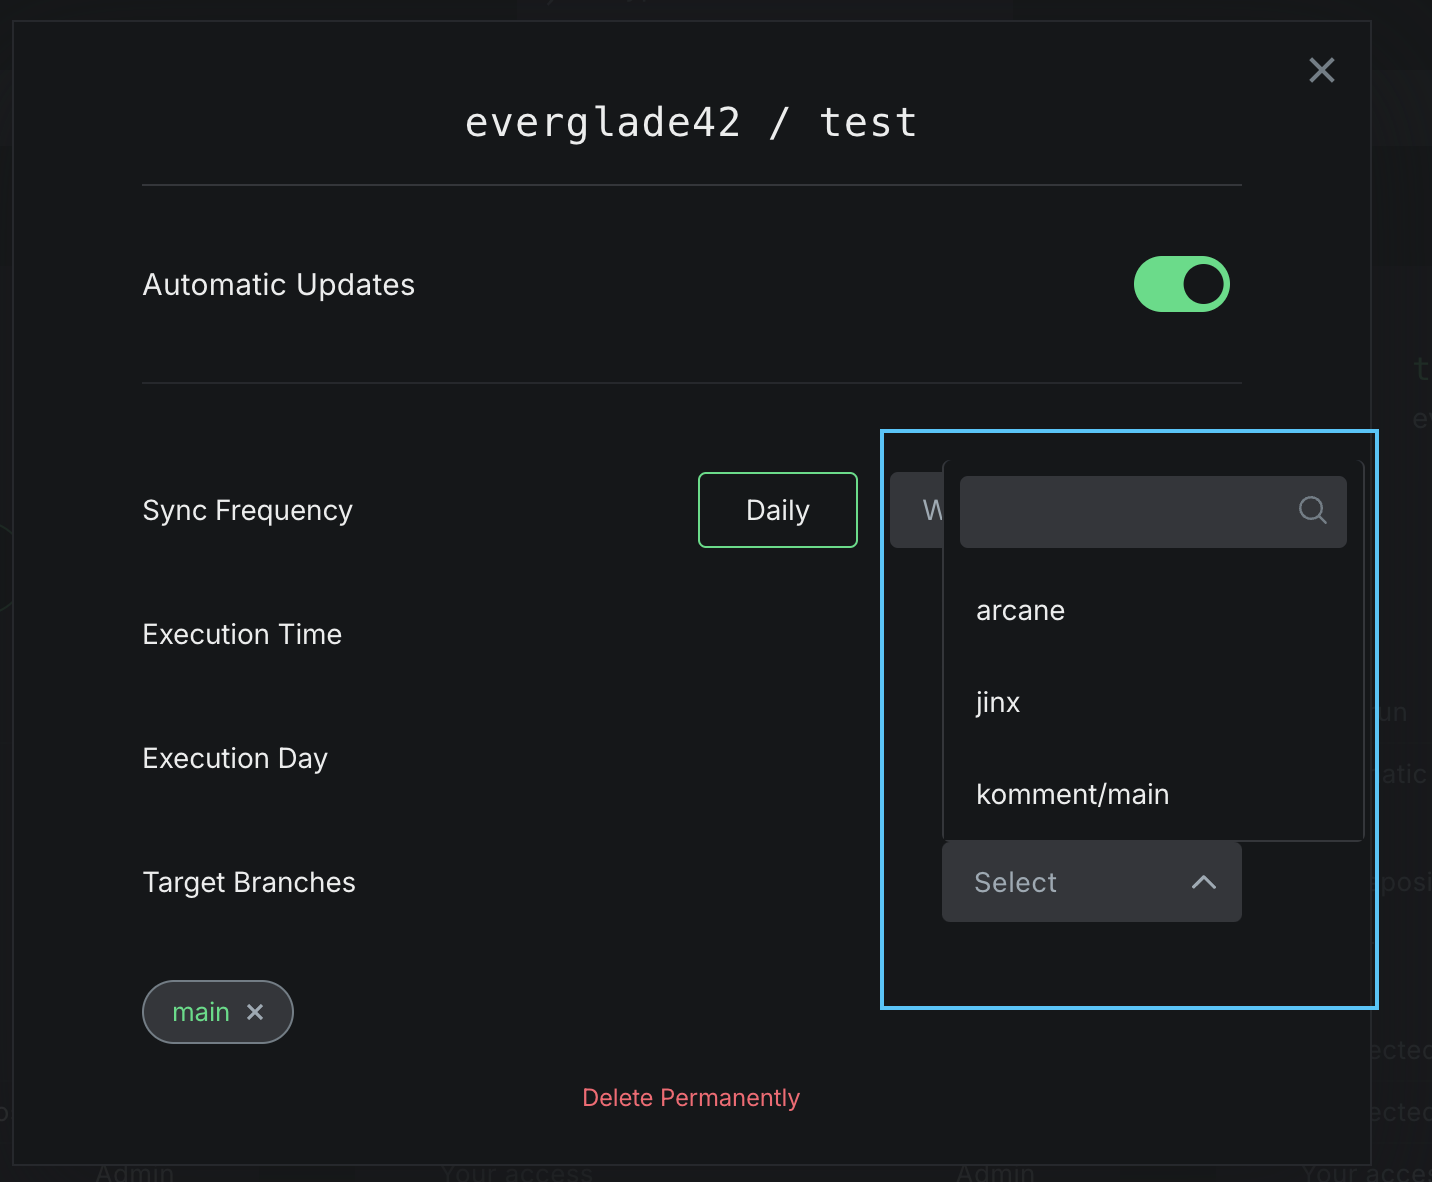
- The selected branch(es) will now appear listed under Target Branches and you will see successful notification as you enable branches.
- To remove a branch, click the X on the branch name you want to remove.
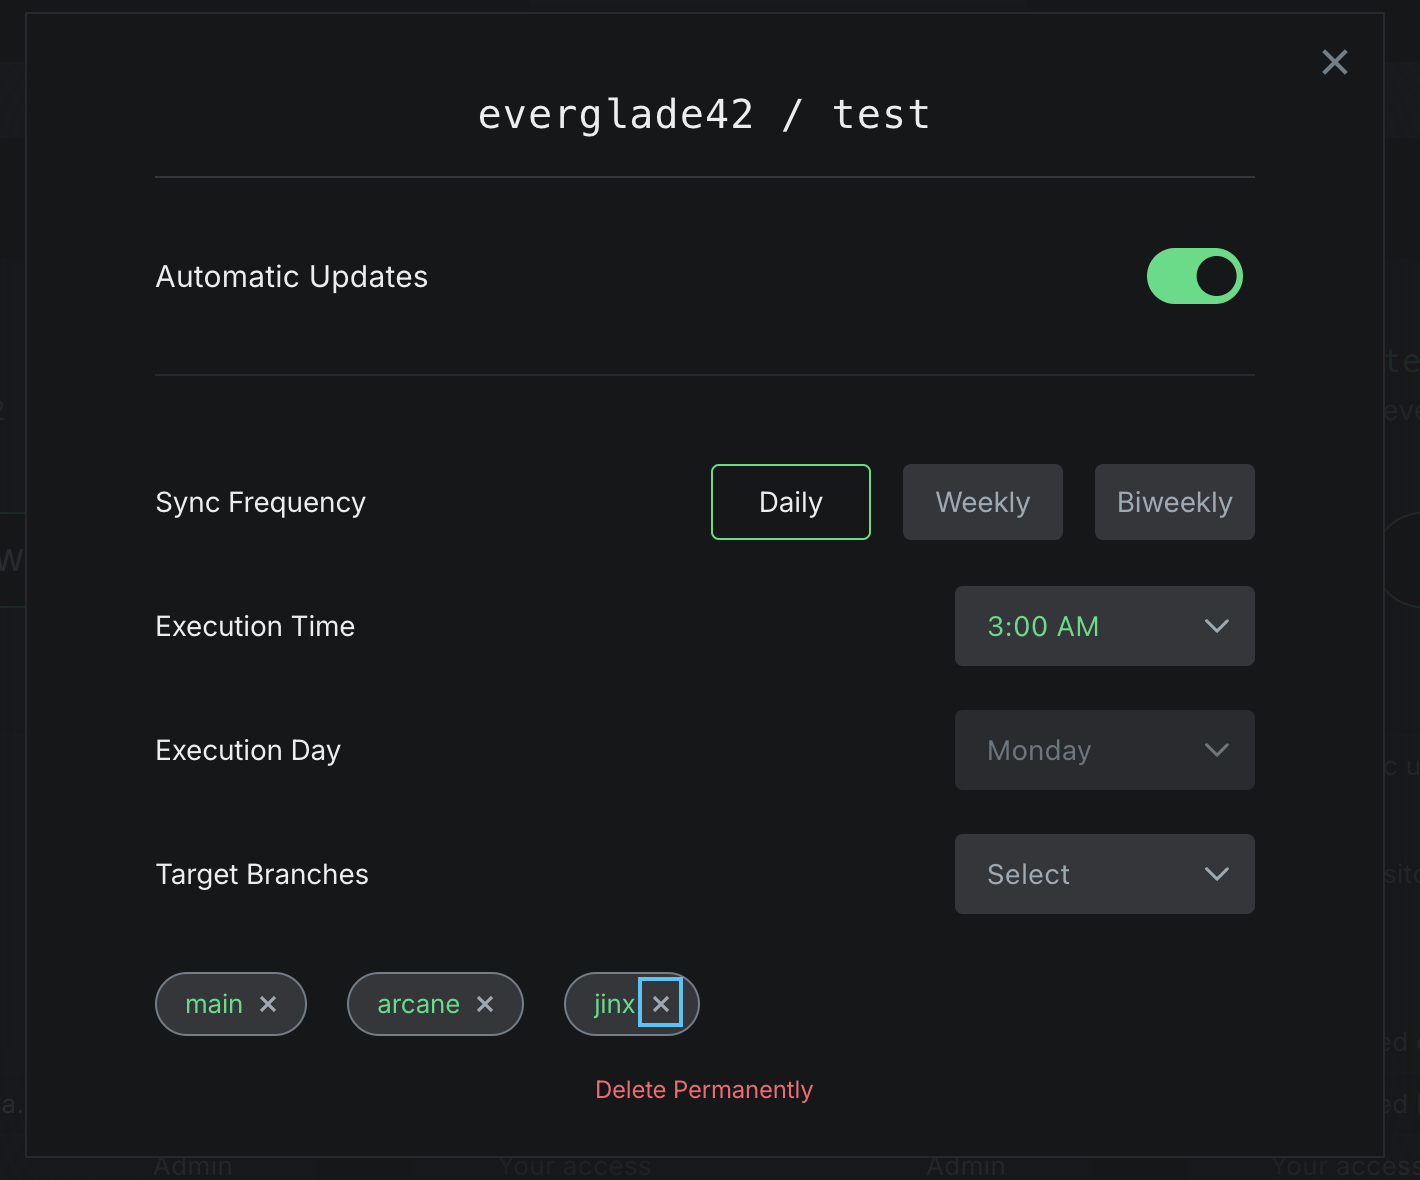
- The branch will be removed and will not receive updates in the wiki.
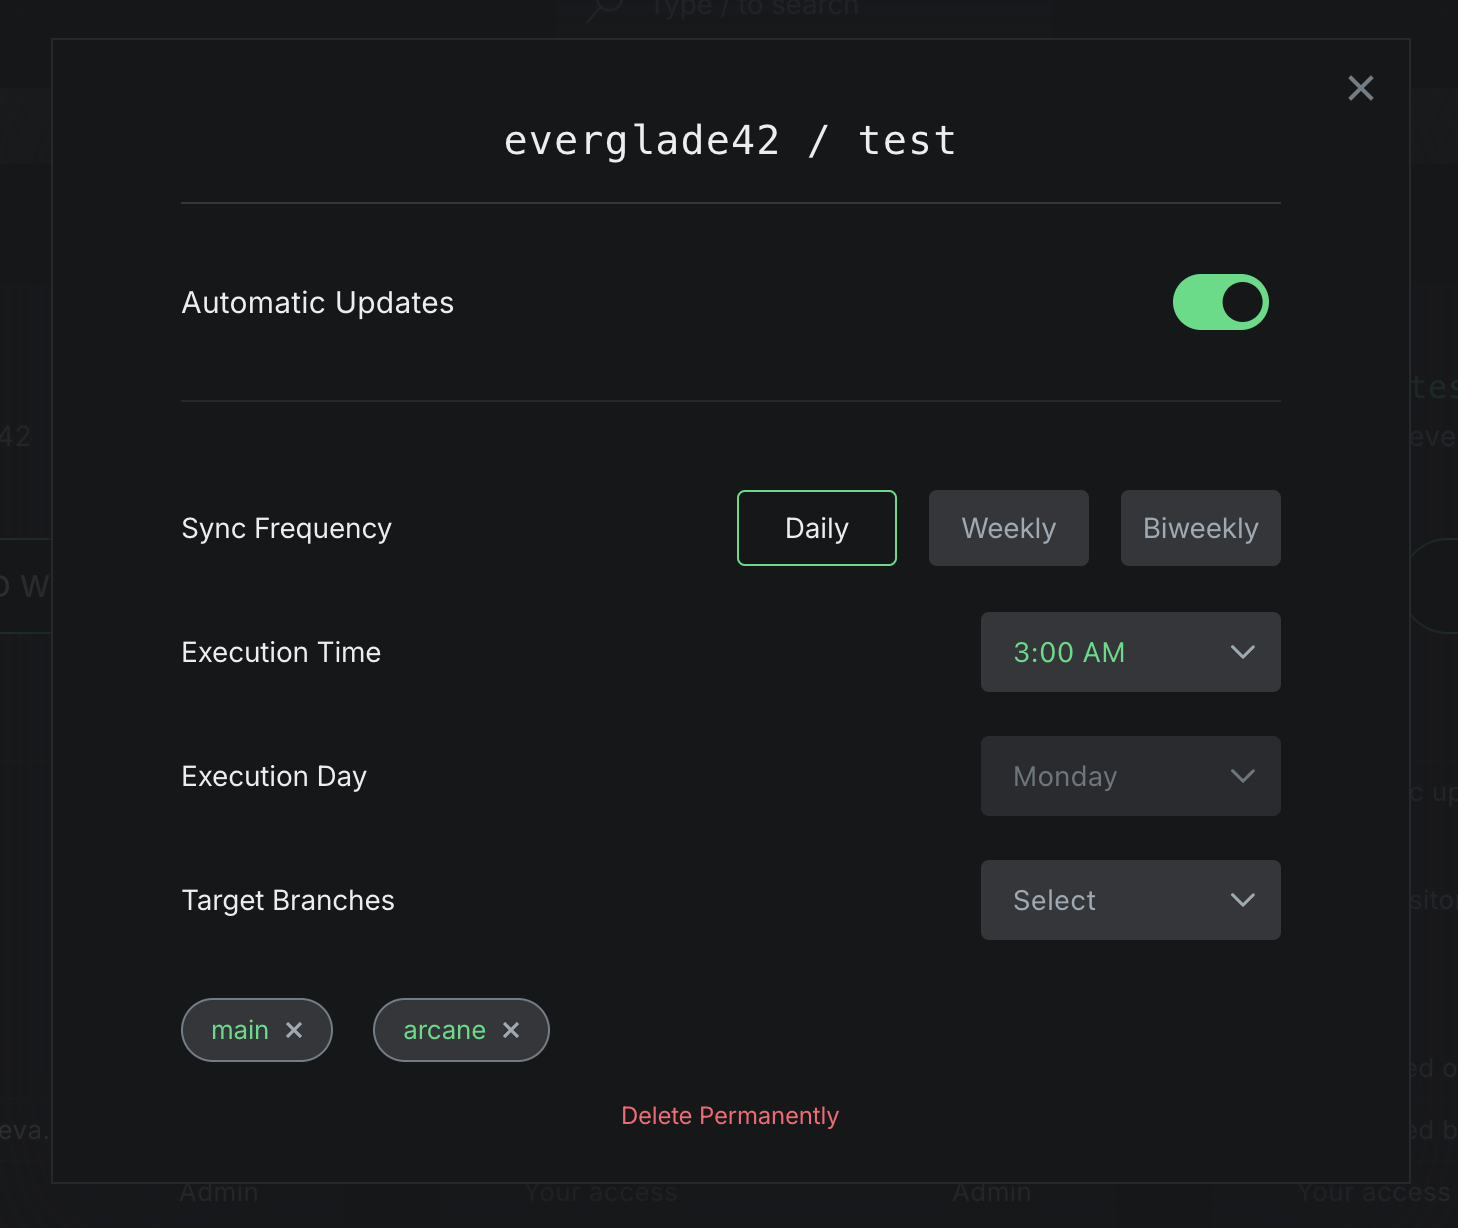
You can remove the default branch for documentation, however at least one branch must be enabled at all times. To disable documentation for all branches, simply disable updates to the project.
Delete Wiki
To disconnect a project with Komment, use the Installation guide. If you would like to delete a project and its associated wikis permanently, use the delete function in the wiki settings.
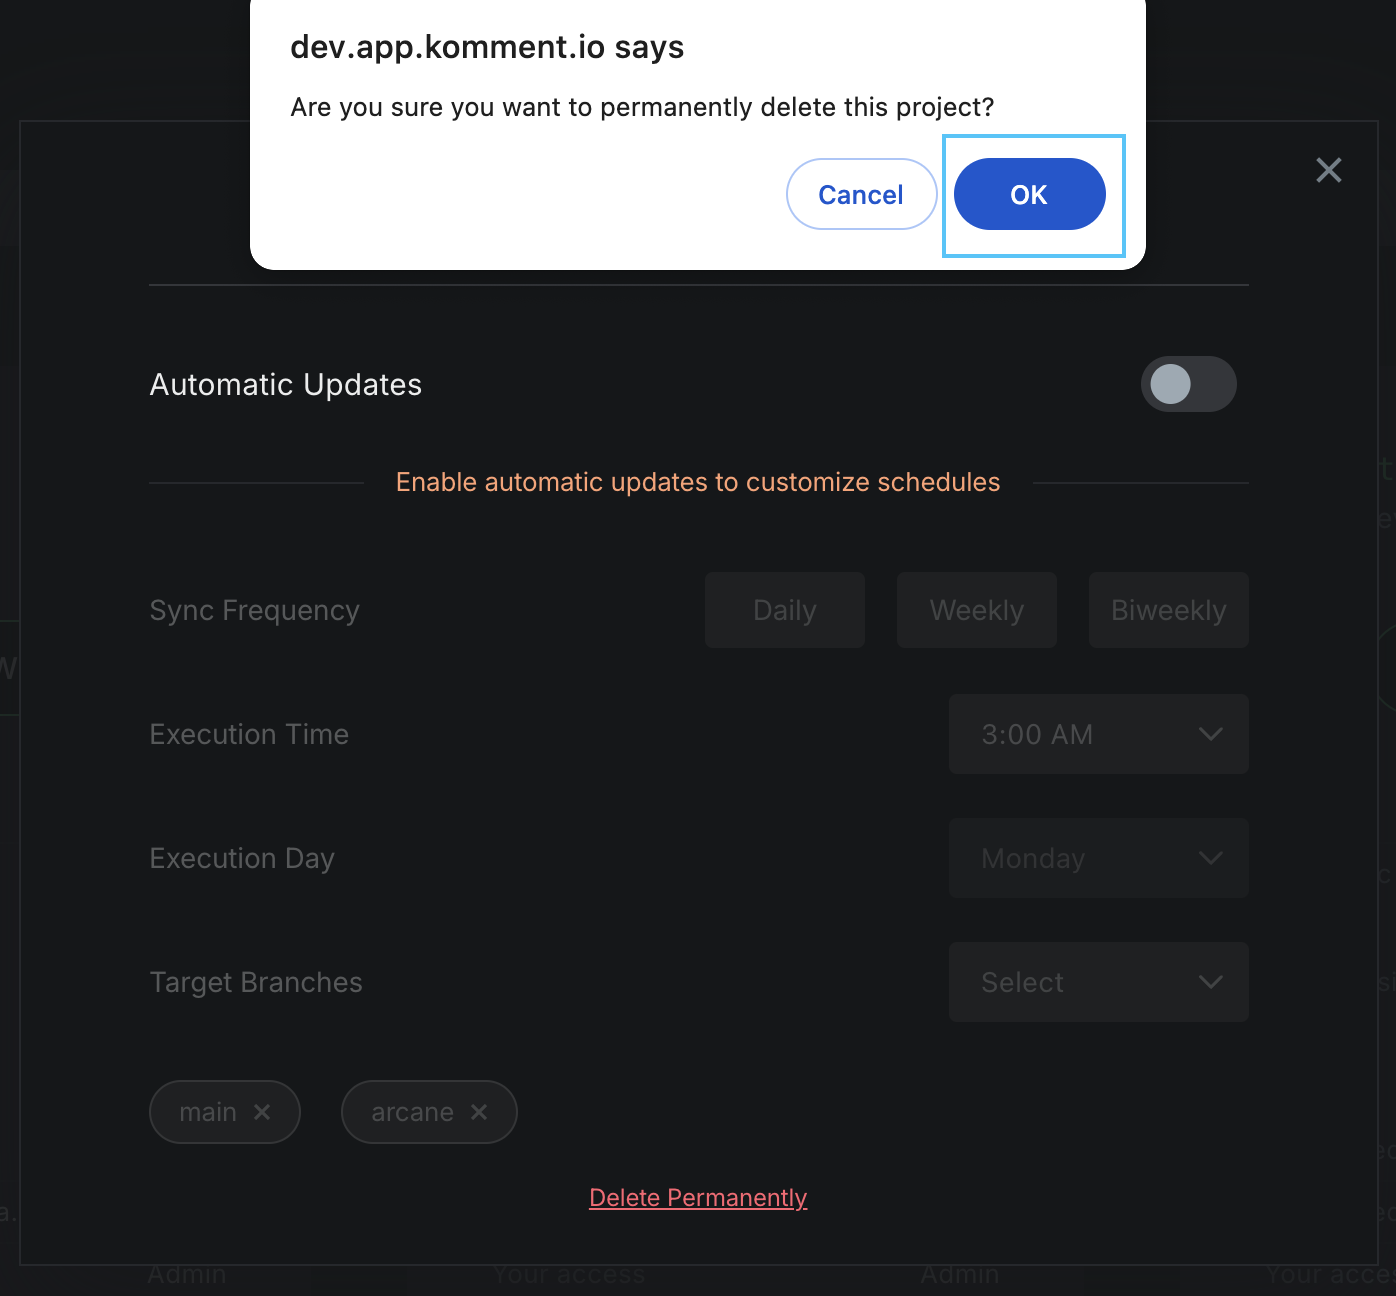
- Click the Delete Permanently button at the bottom of the settings of the project you want to delete.
Caution! Deleting a project and its associated wiki entries is a destructive action that cannot be undone. Your wikis cannot be recovered if you choose to delete them.
- You will be asked to confirm whether you want to proceed and permanently delete the project and its wikis. Click OK to continue.
- After deletion, you will no longer be able to see the project in your wiki cards or access any wiki entries for the project. Collaborators will also lose access to the wiki.